TeamViewer is a remarkable piece of software that let’s you share control of your computer with another person.
It works round any firewall / router complications that Remote Assistance normally has, and I use it regularly to help friends / family with their problems.
Best part is, it’s free for non-commercial use!
Here’s how to use it:
Step 1 – Download TeamViewer
To download TeamViewer, please visit www.teamviewer.com
There should be a little green box on the right hand side of the website that says “download now” or something to that effect.
Once you have downloaded it, double click it.
Step 2 – Running or installing TeamViewer
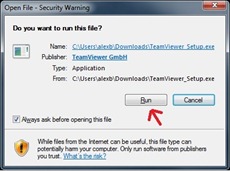
Sometimes, this box will appear – just click “Run”
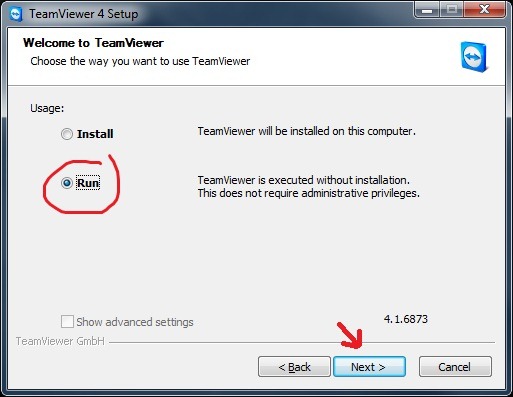
On this screen, select Run.
Since we don’t need to install the TeamViewer software, there is no point doing so.
Click next….

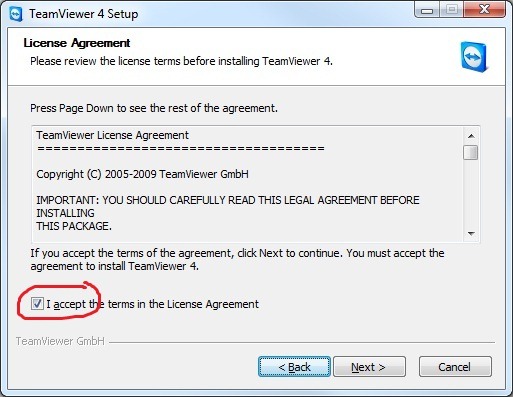
Step 3 – Accept License Agreement
Read all the way through it if you really want, however I’ve never come across a EULA (End User License Agreement) that I don’t agree with….
Select the I accept checkbox, then press Next….

Step 4 – Connect / Be connect to….
If you want someone to connect to your computer, to give you help:
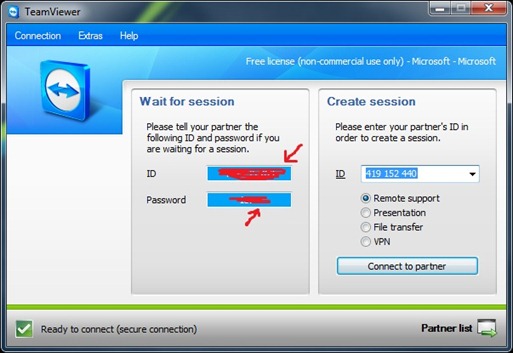
See the left hand panel – Wait for session – Simply give the other person your ID and Password.
If you want to connect to someone elses session:
Enter the ID in the box on the right hand panel. Click “Connect to partner”
It will then ask you for their password.
A box, not unlike Remote Desktop Connection will then appear.


Leave a Reply